Sunday, January 25, 2009

Ice Luge

The luge was a big hit and turned out super cool with a little bit of extra engraving along side the channel. I used my dremmel tool to do the carving. I took some pics of the stand too since it worked out so well. There are a few gnawed off parts though from the squirrels chewing off the liquor that didn't make it into mouths... go figure.

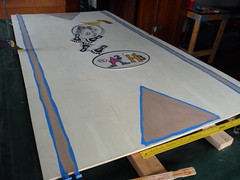
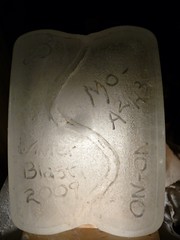
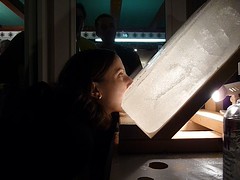
The light under the luge really made it look awesome!


Saturday, January 17, 2009

Homemade Ice Luge

Ice Luge 1
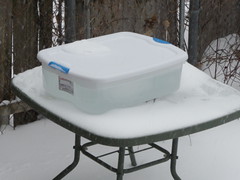
Experiment #.... ? Heck I don't know I lost track. Anyway, this should turn out fine so long as the temperatures stay really really cold! So I bought a 35 Qt plastic storage container that was short and squat from Ace Hardware at 50% off. I consulted my buddy Lance about how to freeze the clearest block of ice. I bought 9 gallons of water from the Meijer refill station which is only .29 per gallon.

The ice looks good
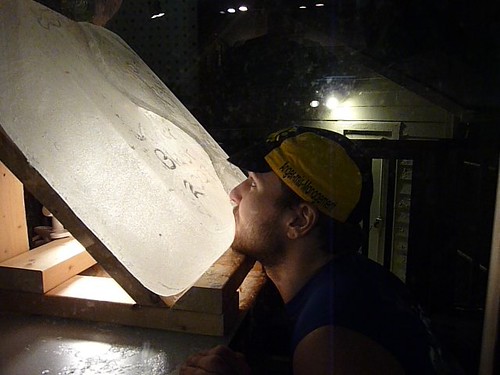
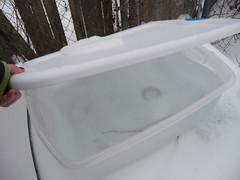
Early this morning I set up my block freezing in the back yard on top of a glass table top. I checked on it after about 10 hours and it looks pretty clear... so far.

The Beer Pong Table is Making Progress

Beer Pong Table

Step (1) Cut the plywood sheet into 4 equal pieces. So it took me a while to get the wood squared and even when I pushed the pieces together. I finally accomplished this by cutting 2 pieces together with them facing in the same manner as they would once hinged.

Next I (2) lightly sanded the edges and both sides of each piece.

After the wood was cut I (3) polyurethane the wrong sided and all the edges. Then it warped some. Ok, more than some... quite a bit. I did get is straightened out mostly by sponging the top and applying heavy weights and clamping it down. Needless to say, I'm now going to do an extra step to make sure the board stay straight for play.

While the polyurethane dried completely, I (4) cut out the decals that I made on my computer and had printed at Costco. They look darn good if I do say so myself.

I then removed the center hinge since it rests on the right side of the wood so I could paint. In step (5) I taped off for 2 lines 3/4" each running the length of the table on both sides, taped off a triangle 3" from the bottom on each end. The triangles measure 16.5" centered at the bottom and a height of 14" from the center of the triangle. Then I primed the taped off sections and painted them.

The paint is drying now then the next step will be to position my decals and urethane the top of the table.

Saturday, January 10, 2009

Plans to Build a Beer Pong Table

Yes, that's right. A beer pong table to entertain our guests on Jan 24 since DH volunteered to host an overnight party at our house. Anyway, I decided to make the beer pong table to fit over our regular pool table mostly because I didn't want the drunks setting their beers on my pool table felt! Oh come on... you know it would happen.

THE PLAN!

Build a folding table top out of 4'x8' birch plywood using piano wire to hinge it. Seal the underside and the exposed edges of the plywood. Attach some beer catching edging at each end. Paint designs and attach printed designs on to table top. Polyurethane the top. Make a carry case with shoulder strap.

Whew! This will by far be my largest free standing wood project. I went to Lowe's and Home Depot and got what I think will be the necessary supplies to complete the project.

I'll have a series of posts here on my blog regarding this project... stay tuned.

In response to a question "Well, Have you made the table?", the answer is YES! It is totally sweet. Here my other blog posts on it since for some reason searching "beer table" in my search box isn't pulling them up.Go figure. Anyway...

http://detroitknitter.blogspot.com/2009/01/beer-pong-table-is-making-progress.html
http://detroitknitter.blogspot.com/2009/02/beer-pong-table.html

I bought some strapping material from JoAnn's and a couple of those plastic buckles and fashioned a carry strap for it. Basically, it gets folded up into quarters then near each end a buckled strap goes around the it. I then clipped on a padded carry strap from a duffel bag I'm not using to the two straps. It is easily carried over my shoulder. Well, as easily as a four 2'x4' hinged pieces of plywood can be carried. For set up away from home I use two of those super lightweight sawhorses made out of plastic and two 2'x8' pieces of lumber that I hinged in the middle. I do need to use a couple shims on the reverse side of the hinges to keep it really straight. I also took out a couple grooved in the 2'x4's so the hinges lie in the groove.

Thursday, January 8, 2009

Re-Cover a Bench Seat

WOW, this turned out great! My dog slept on this bench at the end of our bed for years and being white vinyl it soon looked like a dog had been sleeping on it for years. Well, the dogs are gone and since I recently painted/re-decorated the room it was time to replace the bench seat cushion cover.

I let Dave pick out the fabric from the collection I had on hand.

I made a series of videos explaining how to do it. They're a little long despite exchanging some of the video for worded instructions. Oh well. I'm thorough what can I say!


More tags: re-cover sew make how to recover reupholster replace renew bench seat cushion foam video chair

Trinity Stitch Square

[48sts x 76 rows; in theory would be better for this pattern]

This square knit up way smaller than the others, which I’m sure is because of the pucker from the type of stitch. I could have easily made it 1 1/2” bigger on all sides. Let’s see so for my gauge on size 5 is 4” = 18sts and 28rows but since I only wound up with a square that was 7 1/2” that makes my gauge more like 4”= 21.25 st and 34 rows. So theoretically if I want a square in this pattern to end up being 9” on both sides I would need to cast on 48sts and work the pattern over 76 rows.

Anyway, I wound up building up the edges with some single crochet. It looks ok, but I’ll probably re-do it.

The pattern is within the All About Aran project.

Tuesday, January 6, 2009

Flower Garden Square

[40sts x 64 rows; good]

Looking at the pattern I’m thinking that to get it to fit into a 9” square I need to have a 2 st selvage on each side and work the pattern over the 36 sts between. So I’ll be casting on 40sts. And looks like I’ll work the rows like this:

I’ll work 8 rows before and after the pattern and for the pattern I’ll work 1-24 twice.

An interesting pattern, but I’m not sure about having those long strands for the leaves just hanging there. An enjoyable pattern to knit though. Plus I could have done a better job thinking out the top and bottom border to square it up to 9". I think seed stitch would have worked well or just plain rev stockinette.

This pattern is a section of the Tree of Life Afghan. The pattern can be found here.

Saturday, January 3, 2009

Twin Trees Square

[40sts x 64 rows; a smidge narrow]


This knitted up easily enough. I cast on 40 sts and worked just one repeat of the tree pattern beginning and ending with 3 rows of garter st.

This pattern is a section of the Tree of Life Afghan. The pattern can be found here. http://www.marymaxim.com/wcsstore/MaryMaxim/images/freepatterns/1508.pdf