Showing posts with label How to: Misc. Show all posts

Sunday, February 20, 2011

Excel - Copied Cells with Dates are 4 Years Off

I'm still working on my first end of year data for my little online shop and have recently become quite dumbfounded by Excel. It seems that no matter what I would do I could not copy data in any form (single row, whole worksheet, etc) without the date being off by 4 years and one day. Yeah, that's a bit of a problem. I actually did look into this odd occurrence before, but could not find any online data that wasn't in "geek speak" so I wound up manually changing the dates. 

BUT ALAS!!! I FOUND THE ANSWER. Although I still have to wonder why this would happen. Anyway here it is. Simple as pie and you can quit pulling your hair out!!

  1. In any empty cell, enter 1462
  2. Copy the cell containing the 1462
  3. Select all the cells with messed up dates
  4. Right click and select PASTE SPECIAL
  5. Select the VALUE button
  6. Select ADD button if your dates are 4 years behind or the SUBTRACT button if they are 4 years ahead.

Whallah! The 1492 value isn't needed anymore so you can delete it. I'm still lost as to exactly why this happened to me, but at least now I know how to fix it!

 ______________________________________________________________________
The following information was copied from the help window of Excel 2007 - (I colored the actual instructions in red within the text):

Issue: I'm having problems with dates between workbooks that use different date systems

You can encounter problems when you copy and paste dates or when you create external references between workbooks based on the the two different date systems. Dates can appear four years and one day earlier or later than the date that you expect. You can encounter these problems whether you are using Microsoft Excel for Windows, Excel for the Macintosh, or both programs.
For example, if you copy the date July 5, 2007 from a workbook that uses the 1900 date system and then paste the date into a workbook that uses the 1904 date system, the date appears as July 6, 2011, which is 1462 days later. Alternatively, if you copy the date July 5, 2007 from a workbook that uses the 1904 date system and then paste the date into a workbook that uses the 1900 date system, the date appears as July 4, 2003, which is 1462 days earlier. For background information, see Learn about the two date systems .
Correct a copy and paste problem  
  1. In an empty cell, enter the value 1462.
  2. Select that cell, and then on the Home tab, in the Clipboard group, click Copy.
  3. Select all of the cells that contain the incorrect dates.
To select Do this
A single cell Click the cell, or press the arrow keys to move to the cell.
A range of cells Click the first cell in the range, and then drag to the last cell, or hold down SHIFT while you press the arrow keys to extend the selection.
You can also select the first cell in the range, and then press F8 to extend the selection by using the arrow keys. To stop extending the selection, press F8 again.
A large range of cells Click the first cell in the range, and then hold down SHIFT while you click the last cell in the range. You can scroll to make the last cell visible.
All cells on a worksheet Click the Select All button.
Select All button
To select the entire worksheet, you can also press CTRL+A.
 Note   If the worksheet contains data, CTRL+A selects the current region. Pressing CTRL+A a second time selects the entire worksheet.
Nonadjacent cells or cell ranges Select the first cell or range of cells, and then hold down CTRL while you select the other cells or ranges.
You can also select the first cell or range of cells, and then press SHIFT+F8 to add another nonadjacent cell or range to the selection. To stop adding cells or ranges to the selection, press SHIFT+F8 again.
 Note   You cannot cancel the selection of a cell or range of cells in a nonadjacent selection without canceling the entire selection.
An entire row or column Click the row or column heading.
Worksheet showing row heading and column heading
Callout 1 Row heading
Callout 2 Column heading
You can also select cells in a row or column by selecting the first cell and then pressing CTRL+SHIFT+ARROW key (RIGHT ARROW or LEFT ARROW for rows, UP ARROW or DOWN ARROW for columns).
 Note   If the row or column contains data, CTRL+SHIFT+ARROW key selects the row or column to the last used cell. Pressing CTRL+SHIFT+ARROW key a second time selects the entire row or column.
Adjacent rows or columns Drag across the row or column headings. Or select the first row or column; then hold down SHIFT while you select the last row or column.
Nonadjacent rows or columns Click the column or row heading of the first row or column in your selection; then hold down CTRL while you click the column or row headings of other rows or columns that you want to add to the selection.
The first or last cell in a row or column Select a cell in the row or column, and then press CTRL+ARROW key (RIGHT ARROW or LEFT ARROW for rows, UP ARROW or DOWN ARROW for columns).
The first or last cell on a worksheet or in a Microsoft Office Excel table Press CTRL+HOME to select the first cell on the worksheet or in an Excel list.
Press CTRL+END to select the last cell on the worksheet or in an Excel list that contains data or formatting.
Cells to the last used cell on the worksheet (lower-right corner) Select the first cell, and then press CTRL+SHIFT+END to extend the selection of cells to the last used cell on the worksheet (lower-right corner).
Cells to the beginning of the worksheet Select the first cell, and then press CTRL+SHIFT+HOME to extend the selection of cells to the beginning of the worksheet.
More or fewer cells than the active selection Hold down SHIFT while you click the last cell that you want to include in the new selection. The rectangular range between the active cell (active cell: The selected cell in which data is entered when you begin typing. Only one cell is active at a time. The active cell is bounded by a heavy border.) and the cell that you click becomes the new selection.
 Tip   To cancel a selection of cells, click any cell on the worksheet.

  1. On the Home tab, in the Clipboard group, click Paste, and then click Paste Special.
Excel Ribbon Image
  1. In the Paste Special dialog box, under Paste, click Values, and then under Operation, do one of the following:
    • To set the date as four years and one day later, click Add.
    • To set the date as four years and one day earlier, click Subtract.
Correct an external reference problem  
If you are using an external reference to a date in another workbook with a different date system, you can modify the external reference by doing one of the following:
  • To set the date as four years and one day later, add 1462 to it. For example:
=[Book2]Sheet1!$A$1+1462
  • To set the date as four years and one day earlier, subtract 1462 from it. For example:
=[Book1]Sheet1!$A$1-1462

Sunday, October 31, 2010

HAPPY HALLOWEEN!!!!

2010 Witch Costume
The "Wicked Witch of the Eastside" with her little crow, "Toto", brought havoc
and debauchery to the otherwise quiet city of Birmingham this Halloween.
(DetroitKnitter - 2010)
Being a "creative" person, I sometimes get  a little carried away with dressing up for Halloween. This outfit developed from the prop idea I've had for a while to make the crow in the cage that you see. Actually my original idea was to use one of those fake pumpkins that you can carve, but when I really began thinking about how I would do it I decided that the pumpkin might be a little too heavy and my chain attachment might be compromised due to the weight and material of the pumpkin as well as the factor that it might take a little abuse while out bar hopping trick or treating.

The make up is all CHEAP stuff!! I went to Walmart and found this cool nose and chin set for $5; while it did come with liquid latex to attach the nose and chin, I decided to try this "spirit gum" that I got from Halloween City (seasonal costume store). All of the make up items used to create my face are from walmart for $2 each (some was left over from last year too).

So here's what I used and how I used it--

TEETH: Start with you teeth! I found this small bottle of teeth paint at Walmart ($2) and it works really good! First brush your teeth. It is very important that your teeth be dry or it won't even go on so dry your teeth with a paper towel (I used a hair dryer to really dry them). Now simply paint the teeth you want to blacken out, create chipped teeth, and even apply some at the gum line and give it a little smear. LET IT DRY!! It only takes about 30 seconds to dry I again used the hairdryer.

VERY IMPORTANT!!!!  NOW IS THE TIME TO PUT YOUR COSTUME ON!!! Otherwise you won't be able to get it over the nose and chin without messing up your work. Remember to protect your clothes by tucking paper towels into the neck opening before proceeding. If you are using a wig, now is the time to put your hair up. An old stocking cut and knotted is recommended for wig use. If your hair is long, like mine, put it in pig tails and twist each up to the lower back side of your head and bobby pin it then put on the stocking cover.

APPLY NOSE AND CHIN: First clean and dry your face and wipe your face down with alcohol. Test the placement of nose and chin and trim if needed. HINT: the wavy edge helps to hide the "seam" the best way to trim it is to pull on the section to be trimmed then use small snips to trim it. Are there nostril holes? If not cut some! Now apply the spirit gum directly to your face where the edges of the chin and nose will attach. Now apply spirit gum to the inside of the nose and chin. It's a very small brush and you should use it liberally! Clean your fingers off with the remover that came with spirit gum!! Now wait about 10 minutes then carefully stick the pieces on and press.

APPLY MAKEUP

BASE COAT: Start with a base coat. Since this is cheap make up, it doesn't cover flawlessly, but by creating a base color on the bottom your finished look won't be quite so blotchy. Use the green liquid cream make up that comes in the tube ($2). Cover your entire face! Please be careful not to get make up into your eyes and avoid placing in the corner of your eyes over your tear ducts (wonder how I know this?) Don't forget to do your ears! Let the base coat dry.
TOP COAT: Now use your fingers apply solid green make up (comes in a little rectangular tray with a sponge - $2) and completely coat your face (the sponge it comes with doesn't work well at all). I started near the seam line for the nose/chin and worked my way out. You'll need to make it a little darker in some places and you can create some depth by dabbing on a touch of black solid make up and blend it with more green.

EYEBROWS: Create you eyebrows. You can make them peak or simply thicken what you already have. Use the black solid make up for this and a Q-tip to apply it.

EYES Outline your eyes: You can use the same solid black make up with a Q-tip. Again be very careful not to get this stuff in your eyes! It can cause irritation.

LIPS: I had one of those super cheap clown make up kits with the short little coloring sticks and used the red to go over my lips first, then I used the black lipstick from the lipstick and nail kit ($2) BTW, the nail polish is really bad and drys chalky. I wound up buying some green polish in Wet and Wild in the cosmetics isle (they were out of black... go figure)
WIG: Carefully put on your wig. If it's cheap like mine ($8) it probably hangs too far in front of your face. Tiny little claw clip will fix this! Or you can pull back the front pieces and put them in a small ponytail holder at the back of your head. 
HAT: Put your hat on! These cheap hats ($4) are wind catchers! So put it on down as far as you can and be prepared to chase it down the street a few times if it's at all breezy out. 

Things to note when wearing this costume. The most noticeable thing is that breathing through the nose will cause condensation in the tip of the nose and on occasion when you tilt your head back to down your favorite beverage, you will get drips. The drips will wash away the green and touching/wiping is the worst thing. I kept a couple Q-tips and occasionally dabbed (when no one was looking of course). Taking the solid green make up with you and the black lipstick is a smart thing to do. Put the face make up in it's own separate baggie.


Tips on how to make your own crow in a cage coming up tomorrow. Yeah, it will be after Halloween but since it's 5 o'clock Halloween night now, you won't have time to make one tonight anyway!

Sunday, July 18, 2010

How to take Photos with a pure White Background using a Cheap Camera!

Achieving a white background for a subject photo is not really all that hard and you can do it with many programs including Photoshop Elements which is a free download from what I understand. I use Jasc Paint Shop Pro version 7 and I use a 2 year old $200 camera (Panasonic Lumix DMC-TZ4K). Yes, I do like this camera! To the right are two examples of pictures with bad backgrounds. The original is on the left and the fixed picture is on the right (not that you couldn't tell!) The yarn background was dark and gray and the card holder had a yellow tint. The fixes aren't perfect, but way better than before! The ones I have the hardest time with are the ones that come out with a green-yellowish tinted background. I have some rather simple things you can try; I'm not guaranteeing they will work for you, your camera and your editing software but it's worth a shot, right?

~~~~~~~~~~~~~~~~~~~~~~~~~~~~~~~~~~~~~~~~~~~~~~~~~~~~~

MAKE A LIGHT BOX: There are really just a few things to do to achieve awesome photos that look like they are floating. The first thing I would suggest is building a light box. STOP! This is not hard! Honestly. It's pretty much necessary to achieve the totally white background look. There are many resources online for building one. I have now built three and each one has gotten a little bit bigger. I was pretty happy with my 2nd one, but needed it bigger to photograph totes, plus I use it for knitting videos and the one before was a little tight for that. The first one I made was about 16" square, the second one is about 24"w x 24"h x 20"d and the one I just made is 28"w x 24"h x 22"d. The 1st two were made from cardboard boxes and the 3rd is a simple wooden frame; I thought wiser of making one of pvc since the clamp on lights won't hold well due to the round edges. Also for the first two I used wrapping tissue for the sides (which I don't advise since it's easy to punch through) and this last one I've lined with banner making paper from a 4' roll and I've experimented with white muslin fabric - IMO all 3 yielded about the same effect. I also found no remarkable differences between shining the light through from the outside and shining the light directly into the box. The lights are suppose to be filtered so the ones inside the box are pointed at the sides and top rather than directly onto the object. So basically with my cheap camera I still have to do some digital fixing. A quick word about lights. Like many others I use the cheap clamp on lights found at Home Depot and Lowes. The lights are the curly florescent energy saving ones in 120 watt equivalent and I'm using 3 lights. When buying lights look at the specs and pick ones that are at least 5000k; my understanding is that 6000k-7000k are better white lights, but I didn't know that when I bought mine. Oh and they do get hot, so don't leave your light box unattended with the lights on.

METERING: Change your cameras metering to spot. Check your manual or scroll through your tools/settings on your camera to find it. Here's a description of what the different metering options do.

Click for bigger picture if you can't read the text
STABILIZE: Use a tripod! Or stack up books and set the camera on it; this is important for clear photos. I always use my timer too because even the slightest movement by pushing the shutter button can cause a bit of blur. When taking pictures through the top of the light box, I use a piece of wood with a hole large enough to stick the camera lens through; the wood rests across the top of my light box (pictured above). If I had a fancy tripod that tilted, I would use that, but I don't and I'm thrifty and the scrap piece of wood works just fine.

PHOTOGRAPH: For the purposes of this "lesson" I set my camera to "automatic" or iA on my dial and took a few pictures inside my light box - the ones above of the skein of yarn and business card holder. Yes, I realize that they aren't very good. The reason why they are so out of whack is that the levels are off. There's too much dark; so we adjust the dark! With my editing program there are actually several ways to accomplish the fix and really they all can have the same result; I've included pictures of what these windows might look like in your program. Look on your menu bar of your editing program for the following type of editing options:

Histogram
Levels
Curves
Highlight/Midtone/Shadow

Generally I make my adjustments using the histogram. I'll explain this with the histogram method in mind, but you can look at the pictures and see that this adjustment is done very similarly to levels and curves features. The Highlight/Midtone/Shadow menu does the same thing, but doesn't have a slider. Look at the Histogram window. See the spike to the right of the histogram display window? You want to move the input slider (circled in blue) on the right hand side toward the middle. Ideally the slider should fall right under where the right side of the big curve ends. When you slide it over, you will see the input levels change (circled in red). This will even out your picture and bring the darkness more in line with the lightness of your photo. The middle slider represents the gamma and sliding it to the right or left has the same kind of effect as if you adjusted the contrast. The far left slider brings the lightness into align with the darkness; you would use this if your photo was over-exposed and would move the slider to the very left side of the furthest left curve. Usually the curve of the histogram is much more noticeable, but since I've already posted these photos this is the sample I'm going with (lazy?) Notice in all 4 windows the similarities in the circled items. You should be able to find at least one of these adjustments in your own program or something that adjusts the input/output levels.


What I notice with a lot with my photos is that even after adjusting the input levels there is a yellow hue that still remains. Oh it's not too bad, but so easy to fix! I won't include a bunch of photos for this, but basically you want to reduce the yellow highlights and by doing so you will be adding blue as I have done in the color balance window (pictured right). You can also make this adjustment in the histogram window by editing the blue factor rather than luminosity and again lining up the right slider with the histogram curve. Another choice is a Red/Green/Blue adjustment window in which you simply up the % of blue.

Final slight adjustments can be made using your Brightness/Contrast adjustment, but be careful not to overexpose your subject along with the background!

Trick: If your program allows you, add a white border of say 50 pixels before editing that way you can really see when you have adjusted the background to white or almost white. Crop when done to remove the extra border.

Hopefully this has helped!

Monday, May 3, 2010

How to make a Paper Mache Piñata

pig pinata

Over the last few days leading up to a weekend party I had the pleasure of learning about paper mache and making piñatas! A friend was having a pig roast to commemorate the end of alimony to his ex wife. There has been mention that he was attempting to make a piñata in the shape of a pig for the event. "Ooooh, now this is something I'd like to try," I thought to myself. Well on Wednesday I called him up and asked him if he was successful making the pig piñata; he was not. He said it cracked in half during the drying process. He could have done a few things wrong. 1) he'd never made one and was making it with his kids - so way too much glue was used. 2) he was trying to cover one of those huge punching ball things. I told him I'd give it a whirl.

So I went to work doing a little research about the construction, supplies and methods of making one and the paste. Seems there are a lot of different recipes out there for paste; I've tried to combine the best of them all into what I think will be an awesome paste.

PAPER MACHE SUPPLIES:
3 Tbsp wheat flour
1/2 tsp powered corn starch
(1/4 tsp salt can be added if you live in a humid state and molding is an issue before it dries - I didn't use salt)
1 Tbsp regular white sugar
water
pot, spatula & pie dish or bowl
strips of newspaper
strips of white paper or white spray paint
wet rag to wipe gooey hands on

PIG PINATA SUPPLIES:
pink spray paint (white too if you don't use white paper for the last layer)
masking tape
duct tape
string
1 helium quality balloon
4 toilet paper tubes
1 spray paint top or Scrubby Bubbles top (something resembling a pig snout)
1 pipe cleaner
Cardboard scraps shaped like ears
2 Googley eyes
Nostrils can be foam cut outs or you can just draw them on with permanent marker
string

This is how I made my pig piñata form. First I made the pig form; this included blowing up the balloon and tying it off; taping the legs, ears and snout on with masking tape (use masking tape so you can carefully reposition it if needed). You can tape the tail on now or add it later. Hints: to get the balloon to stay still while you tape on the legs - roll a couple small pieces of masking tape and put them on the edge of a bowl now place the balloon on the tape now tape the legs on top so basically the pig is on it's back; otherwise this part will drive you insane. As you can see I drew like an "M" where the face goes to help with alignment of the eyes and ears. If it doesn't stand up right after you flip over on it's feet, you can shove some cardboard into the legs to weigh it down where needed; in the end it will hang so it's not that important.

Next I made the paper mache glue.
  • In a pot bring 1 cup of water to a boil. Meanwhile...
  • In a bowl mix together 3 Tbsp of wheat flour with the 1/2 tsp cornstarch (add salt if needed for humidity)
  • Stir in cool water (not the stuff on the stove heating) as needed to this flour mixture so it can be poured; maybe 1/4 cup - I didn't measure - it's not that important just so long as you can pour it out.
  • Once the water is boiling remove it from the heat and slowly stir in the flour mixture; a whisk works well, but a spatula is ok.
  • As you add the flour you should notice that it is thickening up a bit; this is good.
  • Now stir in 1 Tbsp of sugar
  • Return the mixture to stove and stir constantly until you get the first bubbles of boiling. DO NOT OVER COOK.
  • Remove from heat and set aside to cool; 10 minutes should be enough.
  • Allow it to cool without stirring until it's luke warm or all the way cool; it doesn't have to be warm when you use it. You can make a double or triple batch; I used some left over the next day and it was fine - cover with plastic wrap if storing for a while.
While the mixture is cooling tear up strips of newspaper. I read that it's recommended to tear off the straight edges, but not really necessary. I did tear off my edges so I'm not sure what would happen if I didn't but I don't think this would be a huge factor. The newspaper will tear easily with the grain; this should be from top down rather than across the print. Tear up a bunch; tearing the lengths in half makes them easier to work with.

Go get your paper mache glue, it should look like it has filmed over and is sort of one blob in the pan. Pour it out into a user friendly vessel like a pie pan. A regular bowl can be used too, but I found it easier to work with the glue and strips in a shallow bowl. Ok, pour the goop from the pan into the bowl of your choice.

Begin applying glued strips to the piñata form. Taking one strip of newspaper at a time, place onto the paper mache glue you poured into your user friendly bowl. It does not have to be submerged. In fact the goop is so thick the newspaper doesn't sink. Pat it onto the glue then take the strip between two fingers and strip the glue off. When stripping the glue off you should be also smearing the glue all over one side of the strip. You don't have to cover both sides; the glue will seep through. The strip should not have chunks of glue rather a very thin coat. Next you will apply the first strip... anywhere; add more strips overlapping the adjacent strip(s). Try not to overlap too much; 3/8" is plenty. When you go around the legs you want the strip to be on both the leg and the balloon body so it is secured when it's all dried. Making little slits on one long edge will help get the paper wrapped around both.

LET IT DRY. If you are rushed like I was; a fan is a huge help. Rotate the paper mache form to dry all sides. Areas around the legs and snout tend to have more paper and glue and will take the longest to dry.

Add another layer: To help see where you need to add the next layer, draw all over the first layer with red marker. (My first attempt to identify was to add food coloring to the glue; this was not obvious enough though.) Again LET IT DRY!

I read that it is recommended to do 3 layers so that's what I did. For the last layer on one I used white paper strips and for the other I continued with the newspaper (more on that below). The white strips need to be a little wetter since the paper is thicker; a thinner white paper other than printer paper would be ideal. Anyway; LET IT DRY!

Ok, three layers are done. You are now probably very giddy (err, maybe that was just me). Now you have two choices. IF you used white paper, it's time to spray paint with pink. If you used newspaper you will want to apply 1 or 2 layers of white spray paint before the pink; trust me yes, this is necessary otherwise the newspaper ink is very hard to cover. BUT I think the all over newspaper pig was way smoother than the pig finished with one layer of white pape.

After you are satisfied with the coverage of pink and it's dry; it's time to poke the balloon. It will not explode (this was my fear). When you poke it the air will simply seep out. Now is the time to cut your opening for the goodies to be added. I tried both a triangle cut on the top and a square cut closer to the butt and lower than the top. A bit of clear tape can be used to secure the flap back down after filling it. Anyway, poke the pig with a pin. Then immediately cut your access panel and help pull the balloon from the sides. This is something I wasn't aware would be an issue and while the balloon pulled itself off the sides it pulled in the sides a little here and there. So remove the balloon asap. The dryer the paper mache the better for this step.

Now it's time to add the features; white glue works great to attach the eyes. Poke a hole for the tail. Take the pink pipe cleaner and fold it in half twisting it to form one thicker piece. Now corkscrew it into a pig tail looking thing and stick it in the hole you just made; add a little white glue around the hole and onto the pipe cleaner and let it dry.

For the hanger, I used two pieces of thin nylon string. The two strings came up from each side of the pig near the top then connected to form an upside down V; this seemed like I would have good balance. You can do this with just one string too, but I felt I wanted two strings. Punch a hole with a thin nail in the pig near the top on one side. Put a small piece of duct tape over the hole on the inside it's easier to find this if you keep the nail in the hole as a guide. Punch the hole again going through the duct tape. Thread in the string. Now you'll need to do more than just knot the string because it will pull out when it's weighed down with candy. I used a couple pieces of thin scrap wood. Not everyone has that on hand so I would suggest making a couple of newspaper rolls or a strip of cardboard like 1/4" thick and say 1 1/2" long. You will tie the string hanging on the inside around your cardboard/newspaper strip. Tie it several times, put it in inside. Do this with the other string. Now take both of the ends that are outside the pig and pull them up evenly and tie them together. You'll probably need another length to string up the piñata when it gets to it's destination so take extra with you. Oh and if you used nylon string, you can keep it from unraveling by singeing the ends by briefly holding a flame to the ends.

All you need now are willing participants and a big stick or bat. I'm not sure of the safety factor with blindfolded children at this point because my pig recipient was an adult and we let him watch the pig explode on impact!

pig shot holder

This other picture here shows the jello shot pig holder that I whipped up using the same concept as above. I made this one in one day; if I really had time I might have been able to come up with something rounder.  :)

More Tags: how to make a paper mache piñata, glue, hang, construct, build, form, create, balloon

Saturday, April 17, 2010

The Sound is not Working on my Computer

Normally I don't  blog about my aging computer that in real life it is 6 years old but in computer life is probably 90! But, this time I am and I do this not only for the benefit of anyone trying desperately to play their favorite radio station through their computer, but for myself. Yes, I actually do refer back to my past blogs to remind myself of how to do something that I've already blogged about.

Ok, so the dilemma is and I don't know why this happens and I do recall it happening once before; suddenly without warning the sound simply doesn't want to work any longer. It looks like everything is playing; no errors, no signs that something is wrong, no puff of smoke nor the smell of burning electrical wires from the speakers or anything. Yes, this has happened to me in the past and I recalled that  the fix was so simple yet so hard to find on the net and this time was no exception. I Googled "sound not working on computer" and I got so much mumbo jumbo from uninstalling drivers to plugging in different speakers/headphones to buying and installing a new sound card that it was enough to make my head spin.

People, I'm here to tell you that if your situation is anything like mine listen up! It's probably that somehow, some way, don't ask me because I never touch these controls, but somehow 1) the mute button got pushed or 2) the Wave volume slider is turned all the way down.

THE FIX:

Open your Control Panel (Start Menu, Control Panel)
Click Sounds and Audio Devices
Click the Volume tab

FIX 1) Make sure the mute button isn't checked
FIX 2) Click the Advanced button which opens the Master Volume window. Make sure none of the volume sliders are all the way at the bottom especially the Wave slider. While you're there make sure nothing is muted.

Ok, that's it. That's all I have. My problem was that somehow, even though I never touched the darn thing, my Wave slider was all the way at the bottom.

IF by some chance you cannot get to the Master Volume controller via the above instructions. You can try this: click Start then Help & Support. Type Master Volume in the search box and execute the search. It should return 2 matches. Click the one that says "Adjust the volume for multimedia playback devices". This should pull up information on adjusting it. Simply click the link it provides called "Sounds and Audio Devices" and this should open up the properties box and then you can follow Fix 1 and 2 as stated above.

These fix suggestions are what worked for me on my Windows XP and I cannot say for certain it's the fix for everyone. I am not a computer geek, I am a crafter, so take it for what it's worth. LOL

Thursday, November 12, 2009

How to Convert MOV to AVI

I love the whole video thing for doing how to's, but I've always struggled with how to edit them. So usually I'll have to do a how to video 6 or 7 times to get it right because I can't cut out my stuttering or when my DH walks in and I completely lose my train of thought. Well, I haven't gotten into this too much yet, but I think I've found an EASY way to convert MOV to AVI. Unfortunately the only movie editing program I have is the free one that came with Windows, Windows Movie Maker. So far the conversion is playable in Movie Maker, but I'm having problems dropping it on the timeline and getting it to play. Anyone out there want to enlighten me as to how to do this?

In the meantime, I'l tell you how to convert your files.

I found this link to QICBOY blog where he gives you the links to the downloads you will need in order to easily convert your files. I know I've said "easy" many times now, that's because it is! There is a little confusion on just how to do it and if you read the comments you will see that apparently it's not working for everyone. So I will attempt to explain to you how to do it!

• Download mplayer and extract the files to say C:\program files\
  1. Click the mplayer link. Click OPEN. Now the zip file gets stored as a temporary file and it open a window labeled  C:\Documents and Settings\Owner\local...... etc. In this window you will see a folder labeled mplayer.
  2. Click the "Extract all files" link in the left column of the window. This opens the Extraction Wizard. Click NEXT.
  3. Where it says "files will be extracted to this directory" you need to change that. So click BROWSE. The window will change to your directories.
    • Click the + sign next to MY COMPUTER, then the + sign next to C: then scroll down and click the PROGRAM FILES link then click OK at the bottom of the window.
    • Click NEXT and the files will begin extracting when done a new window is displayed. Check the "Show extracted files" box and click FINISH.
  4. Your Program files folder will open and you see the newly created mplayer folder. Keep the window open and continue following the directions.
Save mov2avi.bat to the MPlayer folder
  1. Click the mov2avi.bat link. Then click SAVE and a "save as" box will open. It should automatically open the newly created mplayer folder. If it doesn't, open the folder C:\Program files\mplayer (do same steps as when you changed the directory where you wanted to save mplayer, but in addition click the mplayer link to open the contents of that folder. (don't click the second mplayer folder - stay in the one right under Program files.
  2. Click SAVE
While your at it you might as well save the other converter.
  1. Click the wmv2mp4.bat link.
  2. Click SAVE then SAVE again as you did for the mov2avi.bat file.
Create a shortcut on your start menu.
  1. Go back to the window that has your mplayer folder.
  2. Click and hold the mplayer folder with your left mouse button.
  3. Drag the folder to the start menu and drop it (let go of mouse button). This does not move the actual folder rather creates a short cut to that folder so next time you convert a file it will be one click to open the correct folder. Anyway.....
  4. Check your start menu for the short cut then close the program files folder. While your at it you can close the C:\programs and settings\Owner\.... temp window that's still open.
Convert a file.
  1. Double click the mplayer shortcut you made on your start menu (everything working ok?) This will open the mplayer folder.
  2. Open a new Windows Explorer window. The shortcut for that is to press the key with the Windows logo and the E key at the same time. Find the file you want to convert (hey, I don't know where you put it so you're on your own here!)
  3. If you can't see your other window reduce the size of each window so you can see them both at once.
  4. Click once on your file with your left mouse button and drag the file over toward the mplayer folder. DON"T LET GO YET. In the mplayer folder you will see the mov2avi.bat file.
  5. Now hover the file you want to convert over the mov2avi.bat file. The file name will turn a color (mine is blue). NOW YOU CAN LET GO!
  6. A black DOS window opens and runs the .bat file using the file that you dropped on it. When it's done processing, it will say to Press any key... Press a key and you're done! Brilliant!
You now have your original file and a new file with an additional extension of .avi on the end. And it should play! Refer to the comments on QICBOY blog it doesn't work. (One person just had to rename the file and remove the old .MOV extension - windows can be funny about more than one . in a file name)

I'm done. I've spread the word about this super quick converting process; the rest is up to you. So go forth and be creative!

Wednesday, November 4, 2009

Handmade Fall Wreaths

FALL WREATHS - 1 WEEK LATER

I got around to making a couple of fall wreaths. The wreaths that I blogged about earlier this year were made from the ivy that grows like mad along 80' of a fence on my property. I wandered the yard finding some interesting things to put on them except for the plastic flowers of course and that's really only because I haven't experimented with drying flowers yet! So, I used leaves from the died back Tiger Lilys to make the bow; the wooden pod stems are from some Siberian Iris plants; the fuzzy stems are from an ornamental Maiden Grass (cut when it was copper-colored); and the leaves were picked up from the yard.

The fuzzy stems and leaves were semi-preserved by drying them between sheets of paper towel and nuked in the microwave for 1:40 on 50% power. Then I lightly sprayed the leaves with clear matte acrylic paint. The leaves that are on the wreath outside my back door are pretty crisp now and the color looks pretty good, but not as natural as if they were preserved with glycerin (which I've never tried). BTW, the leaves that I didn't use and put in a plastic baggy are still pliable.

To put the wreath together I took a bunch of the Tiger Lily leaves and folded them into a bow shape then secured the bow by wrapping a few more leaves around the middle and used hot glue to secure it. I then hot glued the bow to the wreath. Then I stuck in the ornamental grass and the Iris stems (no glue) then layered the leaves over each other while hot gluing each one to the wreath and each other. Be careful with the hot glue because besides burning your fingers it shows through the leaves a bit so you want to make sure your glue spot will be hidden by the next leaf. Whallah!

Here's what the two wreaths looked like right after putting them together. Pardon my bad photography on this one; I was rushed.


 The picture at the beginning of this post is what it looks like now after being outside in the elements for just over a week. The second wreath was given away right after making it.

Tuesday, November 3, 2009

How to Make Paper Pulp Beads

Make paper beadsSo the other day I decided to make some paper beads with the intention of including them as a freebie item for things sold - not that I've actually ever sold anything... hmmm.

I gathered some paper; some totally headed for the recycle bin and some pink to get the right color. Then I threw in some construction paper I've had around forever and has turned gross colors on the edges from age; see there is a purpose for everything if you wait long enough!. All the paper I used had been printed before on one side and was in my scrap paper bin so technically it is recycled. :)

So first I ripped the paper into little pieces no bigger than 1" x 1". I added some water to a blender that we're no longer using, tossed in the paper pieces and turned on the blender. The paper shot up and all over the sides! Next time I'll let the paper soak up the water a bit for weight before blending.

Blend until all the paper is small and has absorbed water; you shouldn't be able to see the edges of any of the pieces any more and if you can then let it soak for a few minutes then blend again.

More water is better than not enough since you have to strain it anyway, which brings me to the next step. Strain it! I used a small mesh strainer and kind of bounced the pulp up and down in it. I squished it too until it felt rather wet but not soggy. The third picture shows what it looked like.

Next step is mix in glue. I used regular old white glue and used quite a bit of it too. It's hard to say just how much in relation to the amount of paper pulp, but I folded and blended enough so that when I rolled it in my hands I could feel the stickiness of the glue on my palms. To me that seemed gluey enough.

Next I rolled the pulp into balls or other shapes. My pulp probably wasn't loose enough to make things other than circle shapes since I rushed this and I think the paper really should sit in water overnight before blending. At any rate, I rolled the pulp into the shapes as you see and placed them on a piece of waxed paper.

They are currently dry and seem rather hard and have a bumpy, pitted texture to them. Next I'll drill holes, apply a sealer and string them as little gifts.

Sunday, September 13, 2009

Make your own Clothing Labels: The Experiment

On my last post I talked a little bit about the ins and outs and ideas and costs of making your own clothing labels. Now I'm going to get down to making some.  (new label making info)

First I designed a label and I even created the tag FTC tag sort of like what was explained in the wonderful post at Duhbe. I don't have an RN number yet, but oh well. After trying the Avery labels and just not being happy with it not centering my labels, I tried several programs that I have but found that most of them wanted to paste my image in like a resolution of 96 where it was created in a resolution of 300. Finally I found that if I created a document with Word and just used columns to paste my pictures it wouldn't re-resolution them where if I created a table it would. And it was good. I had to manipulate the page settings so the labels would fit just right. I set it for 3 columns with no space between. My labels 2.5" and might be two labels like DuhBe makes or just this one that will fold over; I'm still debating.

First I will try making my own labels by creating a sheet of fabric that I can run through my printer. I'm using Egyptian cotton in white and freezer paper to create my printer friendly fabric.

Make the paper- First I cut a piece of fabric and a piece of freezer paper both a little bigger than 8 1/2 x 11. I accidentally cut it too close to 11 and the fabric way bigger than needed (I was on the phone and distracted... LOL). I did cut the fabric a little bit on the bias which is something that I didn't think of when buying the fabric my fabric is about 12 1/2" but I did turn it a little bit to avoid fraying as much as possible. I placed a piece of scrap flat cardboard on my desk. I placed the fabric on the cardboard then the sheet of freezer paper was placed with the waxy side down on top of the fabric. I ironed the freezer paper to the fabric using high heat. As soon as the iron touched the freezer paper it melted and made little pockets where the iron holes are on the bottom of the iron. I'm thinking that it would be best to place some fabric like a pillowcase on top of the freezer paper before ironing to prevent that. I allowed the fabric and freezer paper to cool completely then cut the fabric paper to 8 1/2 x 11". I chose not to include the pictures here, because it doesn't show more than the words explain.

Print on the fabric paper- My printer is an HP PSC1210 xi and I am using HP brand ink. I set my printer to "best" quality and selected "Photo" for paper type. I put the paper in so that the fabric side will be printed on; for me that meant my fabric side was face down in the printer. Print. Let dry for 15 minutes. I cut off the top 3 images and tried to "iron set" the color. I let it cool and actually it sat for more than 24 hour, but not on purpose though :). On the right you can see what the labels looked like hot off the printer.

My first experiment was just to rinse the labels in cool water. I swished two of the labels individually for about 45 seconds while rubbing it between my fingers. The result: faded labels. Below are pictures of the labels: The left ones are how they looked right off the printer and on the right is how they looked after rinsing them. The words aren't even legible. Bummer.
There is some hope though. While cutting the first three tags, I thought I would use some fray block on the edges. Well I accidentally got a drop of it on part of the ink on one of the tags. It spread a little, but not much. I wondered then if this would set the color just as it sets the edge from fraying. Without further ado I squirted a bunch of it all over a logo tag. It was pretty much dripping and it still had the freezer paper backing on it. I wonder if it would not have ran if the paper were not still on it. Anyway, I let it dry a little bit then ironed it with high heat. It got rinsed in cool water like the previous two. The result: the ink didn't fade and it looked just as it did before the water rinse. It is however much stiffer now and this might not be something that you'd want for a wearable item. Check out the before and after pictures below. I may be onto something here.


Then I decided to try a few other things which all seemed to fail. One I tried spritzing water then ironing over and over again, but I got one big blob of water and it ran right away. I also tried a quick soak with no agitation in a Woolite and water solution which faded right away (the yarn ball is where I applied a tiny bit of straight Woolite with my finger and although it did change color, it didn't fade as badly as the rest after the quick soak. It was then ironed and maybe set. It will probably run though once soaked in straight water. Lastly I dipped a label in pure Lestoil. I patted it dry and a little bit of the ink from the words came off on the paper towel. I then ironed it dry but the cloth I put over it when I ironed it didn't quite cover one of the edges and it turned brown, which I'm sure is from the intense heat on an oil soaked cloth. At least it didn't burst into flames! LOL.
So then I decided to try using other fabric sealer type stuff I had around. The verdict is still out on these since they have to dry and I will treat them at least twice before rinsing. It will take several days before I can determine if any of the three chemical sprays I used on the labels below will be wind up being the winner. So far they look good because they didn't run and they didn't fade. But they haven't been subjected to water yet either.

Well, that didn't work either! I figured for certain this would be the ticket. I must have over sprayed the Scotch-Gard because it bled and then faded big time when rinsed. The regular Camp Dry faded when rinsed also. While the Heavy Duty Camp Dry did fade at least it was still legible, but still not as good as I'd hoped for. Here's what they looked like. (Before the rinse is on the left and after rinse is on the right)


Well now that what I thought would be the ace in the hole failed I am moving on to the pre-treated fabric sheets in the package. I'm using Crafter's Images on Cotton Poplin, which I purchased at Joann. I printed one image and it looked really nice and it stood up to the rinse test. I printed just the DetroitKnitter logo to see how those colors would do and they look great after the rinse. This is the stuff! There are some drawbacks though. I had a horrible time feeding the sheet through my printer a second time for another image and the third time I tried to print on it was a complete loss and I wound up trashing most of the sheet. So you pretty much have just one shot to print on this stuff; at least with my HP printer. One other downfall is that the edges will fray. You can use Fray Check or pink the edges or fold them under and sew though. As you can see by the before and after rinsing photos there was barely any change to the ink and it's very legible!


The next experiment involves the iron-on transfer and ribbon. I've been playing with my logo design and "company name" so these images are different. Anyway, I'm using Wilton's EasyImage light t-shirt transfer. I again made up some labels on Word and printed a few on a sheet. This is tricky because you have to remember to mirror the image before printing which as you can see I accidentally did in the picture below. My first attempt was to put a logo on one side of a piece ribbon and the instructions on the other side. This failed. The ink from each side showed through to the other side. Also I had followed Grumperina's tutorial on how to do this and she said I would need to make the background color the same as the ribbon; this was not true as I later found out that the whatever is white doesn't print white rather it doesn't print at all so it's clear around the image. While this would work, I'm not totally thrilled with the waxy, dull appearance around my logo on the ribbon.

The paper seemed to feed better than the pre-treated fabric sheets, which I was using earlier, but I still had some issues with it with my HP psc1210.


Overall I can say that the happiest I am with everything I've tried is using the pre-treated fabric sheets. IF, I have the need, I may order a yard of the pre-treated fabric from C Jenkins and give that a whirl. I would never chemically treat my own though; that just seems like way too much work!

Friday, September 11, 2009

Make you own Clothing Labels: Investigation

I recently finished making the shell of a pop tab purse and I need to sew a liner for it. I've been thinking how cool it would be to have my own label inside. So I've been doing a little bit of research into this subject. I've discovered that there are a few ways to make your own labels for clothing and items. One way is to print directly onto fabric which is sewn into the article and another is to print an iron on transfer and apply the image to either fabric or ribbon. I'll be trying out a couple different ways to make a label and of course I like to make things cheap but look nice, which is why I'm not going to try to paint my own label and will use my trusty printer. I'm sure there are many other ways too, but I'm trying just two: printer fabric and iron-on transfers. If you want to skip all the ramblings of how I determined the cost per sheet you can scroll down to the the info below the dotted line. :)

 
Yes, people you can now print on fabric right from your desk! To do this you will need fabric printer sheets which you will cut into labels. These fabric sheets can also be used to create any kind of fabric panel that you want to sew or fuse into say a tote bag with a picture of your kids on it. I've sunk myself deep into discovery on the subject that I'm thinking that making your own sheets may not be worth it price and time unless you skip a vital step which makes the ink composing your smiling kid's face permanent.  One such blog boasting the affordability, ease, and even legal jumbo can be found at Duhbe.com which is has a lot of great information about labels and label making.

 
The cost associated with making your own fabric paper is not in the cost of the fabric, but in setting the ink on the fabric. There is really only one product that I've read about that does this; it is Bubble Jet Set 2000. A 32oz bottle of the stuff, which will treat 50-60 sheets depending on thickness of the fabric, costs $15.95 which if at the bare minimum of treating 50 sheets is only $.32 per sheet. However, in addition to this chemical you'll need another chemical called Bubble Jet Rinse, which I have to assume will treat the same number of sheets. The cost of the rinse is $6.95. But wait. There is shipping because of course this cannot be found in a brick and mortar store rather online like at C. Jenkins. The cheapest shipping option was $5.75. So to do the math the chemicals alone will cost $28.65 so now it will cost you 57 cents just to chemically treat one sheet of fabric that you bought yourself (see Duhbe.com for info on fabric choices). Now add the in the cost of the fabric and freezer paper and the total cost to make one sheet of printable, washable, fabric paper has gone up dramatically and you have to put all this together, cut your sheets to fit your printer and you have a huge supply of chemicals that (according to one website) has a shelf life of one year which of course is a consideration. Hmm. But, there is a first-time shopper coupon at the C Jenkins site for 20% off your first order which brings the cost down a bit.

 
Another option through C Jenkins is to purchase PreTreated fabric by the yard. Cost: 10.98 per yard + $1.99 manager's special on shipping under a $20 order = $12.97 per yard and you didn't have to buy fabric, treat it, and store chemicals. You do still have to cut the fabric and iron it to freezer paper though. With this option your "get started fee" is only $12.97 plus the cost of the freezer paper. One yard can be cut to make fifteen 8 1/2 x 11" printer sheets at a price of  86 cents per sheet... SWEET! I didn't even calculate the 20% off for first time orders either; now we're talking big savings. If you're going to make your own I'd say this is the way to go especially since you can choose whatever fabric and color you want.

 
And finally there is one more option I'm exploring to get fabric printer sheets. You can buy pre-cut, packaged, printable fabric sheets saving you lots of time. But there is a downfall... the price. At JoAnn's, you can get 6 sheets of "Crafter's Images" PhotoFabric for $13. Sure that is $2 per sheet, but when you use a 40% off coupon it's 8.27 with tax so that brings the price down to $1.38 per sheet. And if you're super thrifty you wait for a 50% off coupon for a total of $6.89 (inc tax) which brings the price per sheet down to just $1.15 per sheet. This same rule applies to Michael's too, but their fabric printer sheets were like $17 for 10. Michael's do have coupons in the Sunday paper but hardly ever a 50% off one and they will accept Joann coupons through the mail or newspaper ad but not from the internet. You can sign up to be on Joann's email and snail mail list and get coupons right to your door and in your email! This my friends has the balance of relatively cheap and fast all wrapped up together in a package that doesn't waste your entire weekend and is easy on your wallet too.

 
Not all labels have to be made using fabric sheets that you print right in your own printer though. Another way that I've read about to make labels is to use transfer paper and iron it to strips of ribbon. This can create a very cute way to make a label, but the cost factor per sheet turned out to be much higher now that I figured it out. It involves iron-on transfers and ribbon. The cheapest iron-on transfer packets I've found were at Michael's for $10 for 10 sheets. Of course I used a 40% off coupon (told you I was thrifty) and walked out the door paying $6.35. That's less than 64 cents per sheet. A double faced spool of ribbon at Joann's was $2.97 full price which is has enough length to do a lot of labels at a minimal price. Ribbon costs vary depending on width and style. I was looking at a double faced ribbon I think the yardage was 18' which is enough to make 86- 2.5" labels. This type of ribbon with a 40% off coupon of course would cost less than 3 cents per label and since you can get 30 labels on one 81/2 x 11" sheet the cost per sheet would be 90 cents. You would have to use some fray stop type stuff to keep the ribbon from fraying too. The iron on transfer would create a stiffer label and I wouldn't have to worry about bleeding though. Obviously a stiffer label for non-wearables is fine, but I don't know about putting it in the collar of a dress.

 
----------------------------------------------------------------
Here's a breakdown of the costs based on producing one 8 1/2 x 11" sheet of labels. The first two listed are purchasing the materials from C. Jenkins as described above. The third is buying the pre-packaged sheets from Joanns. And the last is the transfer on ribbon method.
My final opinion is that the Pre-Treated fabric is the best way to go. You still have to cut the fabric and iron it to the freezer paper and I definitely would not go with the first option which includes buying the chemicals. The other two options aren't really that awfully expensive considering you don't have to do a lot of cutting and you're supplies are easily stored.
For the experiments I'll be exploring making my own fabric sheets without buying chemicals, using the pre-packaged printer fabric sheets and using the iron on transfers on ribbon and cotton. Stay tuned!

 
Great Resources for treating with Bubble Jet Set. And printer ink information.

Thursday, February 12, 2009

Beer Pong Table

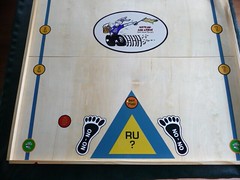
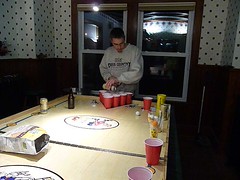
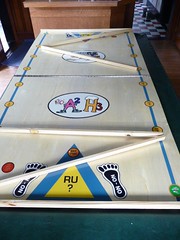
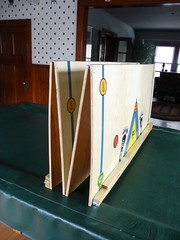
OMG, it turned out terrific! The It was fun to hear the comments about the beer pong table; it is rather sweet. It is 4'x8' and folds to 2'x4' with side rails that fold in too. I plan on making a carry case of some sort for it. The total weight is 44 pounds. I took several pictures of it being folded up... mostly because even I thought it was cool to see.


Sunday, January 25, 2009

Ice Luge

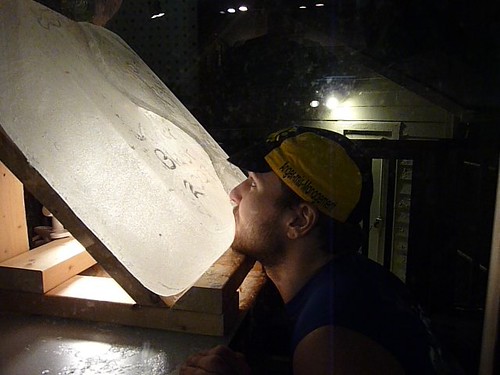
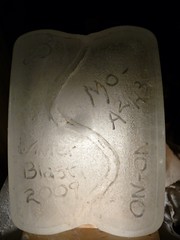
The luge was a big hit and turned out super cool with a little bit of extra engraving along side the channel. I used my dremmel tool to do the carving. I took some pics of the stand too since it worked out so well. There are a few gnawed off parts though from the squirrels chewing off the liquor that didn't make it into mouths... go figure.

The light under the luge really made it look awesome!