Showing posts with label Misc Creations. Show all posts

Sunday, September 5, 2010

Microwaved Apples

I gotta tell you, this was by far the simplest yet most satisfying thing I've made in a long time! So I blogged recently about the microwave bags I'm making that can be used for cooking foods like potatoes, squash and corn in the microwave. Well, one of the things I list that can be cooked in the bag is an apple. I have never cooked an apple in the microwave nor had I tasted one that was, but a friend of mine has. Well, last week I got a convo through my Etsy shop with an inquiry as to just how one would go about microwaving an apple using the bag so, yes, another experiment would be soon in the works.

 
What does a microwaved apple taste like? YUMMY that's what. It's like apple pie without all the sugar and calories! It was the perfect thing to have on a perfectly chilly day in Detroit. I'll bet it would be perfect with ice cream too!

 
It came out very shrivelled!
Is your mouth watering yet? Well order up a bag and by this time next weekend you can be enjoying all the goodness of this very tasty and healthy treat.

 
On to the quick tutorial...  

 
For this experiment I started with a normal size Red Delicious apple.  
  1. Wash apple
  2. Cut the core out of the center from the top but don't cut all the way through to the bottom. Rinse.
  3. Wrap the apple with a damp paper towel and put in the microwave bag so the apple is right side up.
  4. Micro-cook on high for 2:30 (I tested mine after 1:30 and it needed more time)
  5. Remove from bag and paper towel. Caution: Very HOT!!
  6. Cut, sprinkle with a little cinnamon if desired and enjoy!
That has seriously got to be the shortest tutorial I've ever done!

Tuesday, November 3, 2009

How to Make Paper Pulp Beads

Make paper beadsSo the other day I decided to make some paper beads with the intention of including them as a freebie item for things sold - not that I've actually ever sold anything... hmmm.

I gathered some paper; some totally headed for the recycle bin and some pink to get the right color. Then I threw in some construction paper I've had around forever and has turned gross colors on the edges from age; see there is a purpose for everything if you wait long enough!. All the paper I used had been printed before on one side and was in my scrap paper bin so technically it is recycled. :)

So first I ripped the paper into little pieces no bigger than 1" x 1". I added some water to a blender that we're no longer using, tossed in the paper pieces and turned on the blender. The paper shot up and all over the sides! Next time I'll let the paper soak up the water a bit for weight before blending.

Blend until all the paper is small and has absorbed water; you shouldn't be able to see the edges of any of the pieces any more and if you can then let it soak for a few minutes then blend again.

More water is better than not enough since you have to strain it anyway, which brings me to the next step. Strain it! I used a small mesh strainer and kind of bounced the pulp up and down in it. I squished it too until it felt rather wet but not soggy. The third picture shows what it looked like.

Next step is mix in glue. I used regular old white glue and used quite a bit of it too. It's hard to say just how much in relation to the amount of paper pulp, but I folded and blended enough so that when I rolled it in my hands I could feel the stickiness of the glue on my palms. To me that seemed gluey enough.

Next I rolled the pulp into balls or other shapes. My pulp probably wasn't loose enough to make things other than circle shapes since I rushed this and I think the paper really should sit in water overnight before blending. At any rate, I rolled the pulp into the shapes as you see and placed them on a piece of waxed paper.

They are currently dry and seem rather hard and have a bumpy, pitted texture to them. Next I'll drill holes, apply a sealer and string them as little gifts.

Friday, October 30, 2009

Halloween Costume - the unfortunate homecoming date

Halloween 2009
Back in 1984 in the town of Allen Park, MI a tragic accident happened when a vibrant young lady ran herself over with her own car. Investigators speculate that when she entered her vehicle to go to the homecoming dance her shoe fell off and out of the car and when she reached out of the car the steering wheel broke off and she fell out. The car being parked on a hill began to roll backward and she was struck by the open door and pushed under the car where the front driver's side tire ran her over. She still roams the earth to this day looking for her lost shoe and a good party and is often seen with the steering wheel in her hand.

To make the tire marks for this Halloween costume you will need.
  • A dress or other attire you wish to wear
  • Black acrylic paint (get fabric paint if you plan on putting it on heavy otherwise plain acrylic is fine)
  • Sponge piece (a rag will do too, you'll just have to work it more)
  • Cardboard (or newspaper)
Insert the cardboard into the dress. This will block the paint from bleeding all the way through to the backside. Lay the dress with the cardboard inside down on the ground in front of the front driver side tire and angle it in a direct line to where you want the tread marks to fall.


Halloween dress before running it over

Next you will roll your car tire to just before the dress. Take the black acrylic paint and apply it to the sponge then begin dabbing the tire tread with the sponge. Reload more paint as necessary and paint about 8 or 10" of the tire; do this quickly though because you don't want your paint to dry on you. Also don't glob the paint on the tire because you want a crisp impression of the tire. Practice on some newspaper first if you find this scary. After you finish with the first section of the tire, hop back in the car and very slowly drive forward over the dress. Stop rolling before your paint runs out! Get back out and apply paint to the next section then roll that on. Repeat until you've completely ran over the dress. Allow the paint to dry for about 1/2 hour before moving it. Take out the cardboard, admire your handiness and giggle hysterically at how much fun you are going to have wearing this!

Halloween dress after running it over

A couple of notes:
  • Be careful in all the excitement that you put your car in park before jumping out!
  • Don't do this on a surface that you care about getting paint on
There are so many different ways you can do your face for this. A simple, not so messy way is to drip a little bit of fake blood on a couple locations on your face. IT ITCHES when it drips... I'm just warning you! Or you can go all out and use several products to create your look.

For my face I had on hand:
  • Liquid latex (I had some that came in a kit)
  • tissue paper (umm, from the bathroom!)
  • face paint in black and white (the kind you squeeze from a tube - available at Wal-mart and JoAnns for sure)
  • Face paints in stick form (black, red, blue); not totally necessary, but way helpful
  • blue food coloring (baking isle at your grocery)
  • fake blood
To make the gashes: First I will tell you not to put the gash too close to your mouth because all the movement of laughing all night might cause the gash to un-adhere. Anyway, take two ply tissue paper and peel the two pieces apart so you're only using one ply. Tear two strips about the size of the gash you want to make tear off the ends of the strip so it's not square. I first cleaned my skin with alcohol (not sure if necessary) then applied the liquid latex to my skin over the area where I want to create the gash. Working quickly stick the first piece of tissue onto the latex; you'll want to sort of squish it up to create a ridge. Let dry a bit and put some more latex on and another later of tissue the same way. Again allow it to dry then put latex over the entire tissue mess you now have stuck to your skin. Let the latex dry completely for each gash before moving to the next step.

To make a deathly looking bluish face with gray undertones: If you bought a stick of black face paint you will use that first and color in all around your eyes. You will basically have what looks like two black eyes. If you didn't get the stick it's ok you'll just use the tube of face paint and do the same thing.

Next squeeze out about 1 tsp of  black face paint and a small dab of white onto a mixing surface (glass bowel would work). Mix the colors together with a stick or a Q-tip that you've pulled the cotton off of and and mix until your paint is dark gray; add more white to get the right color. Now apply this color over the black you've already applied around your eyes and blend it. You don't have to get too close to your eye if you used the black face paint stick already. Next you'll apply some dark gray under your cheek bones and below your mouth to create a sunken look. Don't worry too much about making it perfect at this point!

Now you'll make the blue toned all over face (and body) paint. I'm sure there are many ways to do this, but this is what I've learned. If you don't like the idea of wearing a mask all night you can do more of a color wash where you will dilute the following instructions with water I diluted the paint quite a bit to cover my arms because I didn't want it coming off on everything - see picture. If you're just doing your face you'll need maybe a tablespoon and a half of white and obviously more for body parts (less for a color wash). So squeeze out a gob of white and add just a dab of black and ONE drop of blue dye. Mix it together and adjust the color by adding more of what it seems to be lacking. Once you get your desired color you will completely cover your face. This is not as easy as it sounds! Try to work so you always have a wet edge to blend into. If it gets unworkable you can add just a drop of water to your fingers with some paint and go over the messed up part. Remember though that the black you already put on is water soluble too and you can easily mess that up so apply as quickly as you can and blend into the gray areas. If you like your look you can stop now, if you think it looks too thin apply another layer. The more layers you apply the greater the risk of messing it up and the harder it is to work. I have on one layer of blue tone in the picture with the nerd (sorry Lance) and two layers in the one with the swine flu pig on my right shoulder.

If you bought the variety pack of face paints in a stick a cool/gross thing to do is take the blue and paint veins runnins down your neck and onto your chest. That freaked out a few people too! (cool)

Add tire marks on YOU: To make the tire tracks running from my chest to my shoulder I lightly dabbed a rectangle-shaped piece of sponge into some pure black paint (spread the paint thin so you can more or less stamp on the tread). Can you believe that many people didn't even notice that my dress ended and those were my b**bs almost hanging out? Did I mention that this is really my homecoming dress from 1984?!?

Add Blood: Once you get your face on you can add blood. WARNING: it itches when it runs and at this point you can't touch your face! That being said I found that using a red make up stick to make the blood from my nose was not as maddening as dripping the fake blood. To apply the blood basically just lightly apply the opening to where you want the blood and squeeze. You definitely want to put blood on your gashes and you can even darken them a bit before hand by adding a tad of black directly on the ridge part of the latex then lightly apply the opening and squeeze while moving the bottle across the gash. Squeeze more where you want it to run and less where you don't. After applying be careful not to lean sideways or the blood trail will change direction. I take the blood with me and re-apply every hour/hour and a half for a fresh gory look that will drip while your chatting with your buddies and that'll really freak them out.

Before I end this super long post, here's a couple more tips.
  • Rat your hair for that ran over look (take a clump of hair and rake a comb through it from the ends toward the root. Apply hair spray.
  • A steering wheel cover (Wal-mart) is a great accessory and helps tell the story; it's amazing how many people don't see the tire tread marks!
  • Accessorize! Dress like you really were going out; earrings, necklace, mascara, maybe elbow length gloves (I used little stretchy gloves with matching socks that I cut off the foot part and wore on my forearms) You could get a tiara and come up with a whole new story about the tragedy and certainly change your story to fit your dress/accessories.
  • Be careful not to put blood where your seat belt will smear it; or apply it to that part when you arrive.
Ok that's all I can think of at the moment... Have a frighteningly good time!

Wednesday, October 7, 2009

Stenciling and Painting T-Shirts


So for the past couple of years at least we've had a beer stop at the FreePress Marathon. This year is no exception and since I have tons of time on my hands and being the experimental type I decided to make some shirts. They will be a mock of the real logo except that the silhouette runners are carrying beer -- hee, hee. The shirt pictured above was my first attempt at the bridge; I discovered that it would take more work to get the look I want.

I cut out the stencil using the plastic stencil sheets from the craft store and several very sharp exacto blades. For a cutting surface I picked up one 12"x12" ceramic tile from Home Depot. I made a stencil for each color and labeled the bridge pieces because they would have to go back in to block the yellow. Before beginning tape a piece of wax paper inside the shirt so the paint doesn't soak in all the way to the back of the T.

After lining everything up, I stenciled the bridge. As you can see there was a lot of tedious work to put all the stencil pieces back in to make the bridge the way I wanted it to look. I went back later and hand painted on the cables for the bridge.


After the yellow was dried I rolled on the red with a stencil roller and let those dry then did the blue. The red and blue was a breeze compared to the bridge!


Next I put the wording on. I printed it off on my computer and then used a small light under a glass table as a light box. Now that I can see the words I used a fabric marker and outlined the lettering. I will be using a nifty little battery operated air pump painter to fill in the lettering, but you can just fill it in with the fabric marker. I did notice that the marker alone faded after the first washing so make sure you fill it in dark!


After it was dry I used this same outlining technique and put hash names on the back of the shirts. I got a little creative with some too!


Technical stuff:
  • Jerzee brand shirt: 50% cotton, 50% polyester
  • Paint: Cheapo Craft Smart from Michaels mixed 2 parts paint with 1 part Ceramcoat Textile Medium from Joanns (you can use Joann brand paint I'm sure - I just happened to have some of the paint colors already so I stuck with Craft Smart)
  • Tape wax paper inside the T-shirt before painting and leave it there for multiple colors.
  • Use very sharp exacto to cut
  • I bought a T-shirt cardboard cut out with a waxy surface. If you mark the corners of your stencil onto the cut out (or on a piece of masking tape on the cut out like I did) it helps to get your stencil lined up and you'll only have to measure once. Also I drew a line for where the collar is so that when I put the stencil down it would always be at the same length down from the collar.
  • Spray adhesive is a must for the stencil. I found mine at Michaels. I later found the same stuff by Elmer's at ACO in a much larger can.
  • I didn't wash the paint after every stenciling. I did however wipe the stencil while it was still on the just painted T. It seemed that after about every 4-5 T's that I needed to ungoop the stencil and respray it.
  • You can clean the adhesive off the stencil with a Goof Off type product. Alcohol (not the drinking kind - heaven forbid) will remove the last bit of goop. I found it handy to totally clean the stencil like this after about 15 T's.
  • The cleaner and tackier your stencil the better the image will come out.
  • For the yellow I used a sponge and dabbed on the paint and rolled the blue and red. I found a stencil roller at Joanns.
The shirts came out fabulous! I also did one using a polyester/spandex mix cheap tech shirt to see if the paint would last. All together I' made 27 shirts... hey, that's more than a marathon of shirts!

Using a stencil I also made a bunch of signs to put along the course...


(Tags: how stencil shirt t-shirt paint acrylic adhesive roll)

Friday, September 25, 2009

Painted Garden Marker Rocks

Painted Garden Rocks

This is one of those experiments that I didn't really investigate too much. I used regular old acrylic paint and then sealed the rocks with lacquer. Why lacquer? Cause that's what I had on hand. We'll see how well it holds up.

Tuesday, August 25, 2009

Update - Browning Ivy


The Ivy wreaths that I hand wrapped back on August 13 are really starting to turn brown now. They are hearty wreaths and have a nice look and feel to them. I'm still not sure what I will do with all of them yet :)

Thursday, August 13, 2009

Refinished Patio Tables

This table was a worn, ugly green


This one was an white and rusty.I salvaged (garbage picked) these 2 tables at different times from the curb. I took them apart and painted them with Rustoleum Hammered Spray paint. They turned out really good! The round one had some screw damage so I wound up putting new screw threads in the legs; this was not an easy task; it should have been but it wasn't. Both tables are made out of metal tubing. For $7 each table in paint they turned out great!

I think I finished the first table back in June, like that matters, but whatever. :)

Ivy Wreaths

Ivy Wreaths stacked


I'm sure I've posted pictures of my ivy wreaths in the past. This time around I wrapped a lot more vines into the wreaths to make them heartier. These will be way cool when they dry. I saw the neighbor out across the street and since I had just wrapped up a bunch of wreaths I took one over to her. She immediately hung it on her door... green as all!
Ivy wreaths

Sunday, June 21, 2009

Log Cabin Birdhouse and Bird Feeder

Bird Feeder - Cardinal

So I've always wanted to make a birdhouse or a bird feeder and now that I've finished the landscaping in the newly found backyard patio, what a better time. I looked for "thin" wood like what I've seen the pre-made birdhouses made of, but couldn't find it at a reasonable price. So I decided to use a couple of my 40% off coupons and just buy the pre-made ones. They are awfully cute after all. I dug up some really old acrylic paint and some newer acrylic paint and went to work mixing some to get different colors.

Log Cabin Bird HouseFor the log cabin, I stained the log and the chimney is drawn on with a Sharpie. For the feeder, I made 6 inserts to cover the window before painting so I didn't have to be too careful with all that trim then painted them. Lastly I sprayed both with an matte acrylic sealer. Log Cabin Bird House - mountedThe birdhouse looks a bit funny on its big pole. The pole is a PVC pipe that I painted with a floor pole plate thing attached to the bottom of the birdhouse then the connector piece on top of the pole fits into the floor thingy. I secured the pole in the ground by cementing a slightly larger piece of PVC inside of a 4x4 cement block. When dry, I fit the tall pole inside the mounting pole and inserted two bolts through predrilled holes. It seems to be working fine and it's not too wobbly in the wind.

The ivy wreath is in a perfect spot for birds waiting to get onto the feeder; yes, it's that busy some days. I've only seen a male and female Cardinal, Sparrows, and Wrens so far. The feed is the cheapest "morning song bird" mix from Walmart at about $5 for a 10 pound bag, which is a good thing too because they can easily eat an entire feeder full in a day!

Bird Feeder - SparrowsI was disappointed when I discovered that the wood of the bird feeder had split from the weather. I took it inside and pretty much disassembled the entire top and the tray and re-glued them with Gorilla Glue for wood. They probably used some cheap glue or not enough and the slightest bit of moisture spread the wood apart. Yeah, I sealed it, but not super well, I figured a few light coats would due. I'm now re-thinking that thinking. I haven't taken the log cabin back down for inspection, but I'll bet it's splitting too.

About a year later, I came to the conclusion that the bird feeder was put together with white glue which dissolves when wet. Read more about it on this post.

At any rate, I'm enjoying watching the birds from time to time and I wonder if anyone will move into the birdhouse.

Tuesday, May 5, 2009

Clay Pots


I've already added a bunch of plants to the new backyard fire pit and patio and really need something in the corner. I'd love to have a little waterfall, but I'm not into spending that much money. My first thought was making a birdbath from the pots and getting a saucer at the Depot ($15 though), but then Swing Driver Mike informed me of how mess a birdbath can be and the mosquito factor. So I decided to ax that idea and move on.

Clay Pots stackedI have an idea for making a clay pot planter using these clay pots. I decided not to paint the clay pots since the upkeep would certainly drive me nuts. I used spray paint to finish the plastic pot on the top. The structure actually looks better within the landscape. This looks kinda bad. LOL

Wednesday, March 25, 2009

Fire Pit


Do you ever wonder what was from long ago in the house you live in today? Well, this has been one of those adventures of finding out. I decided I'd go into the backyard where the dogs used to reside and finally dig up the remains of what I was sure was an old BBQ build out of red brick. The only thing showing of the old BBQ was the very bottom layer of red brick was mortared to cement. What I didn't know at the time was how much cement there was. So I grabbed some tools and some more tools and yet more tools because as I worked and worked to remove this stubborn piece of yesteryear protruding above the dirt and pea stone, I discovered that there was an entire patio buried beneath. Ooooh, gold mine! So earlier in the year I had set up a temporary fire pit on the other side of the yard, but this new found gem has gotten my mind thinking.

This my friends is how projects are born!

First off the new patio had a few problems. One was that in order to put this monstrous fire pit down I would have to level the patio pieces which had heaved a little over time. So I made a frame and poured some concrete. Then I situated stepping stones on top of that then mortared together landscaping brick on top of that. So what I didn't use "fire brick", which I honest still don't know what that is, but this was a cheap project that hopefully will last long enough; plus I wasn't using these bricks for anything anyway!

There's a whole bunch of ideas running through my head as to what I'm going to do with my newly found play area.

Thursday, February 12, 2009

Beer Pong Table

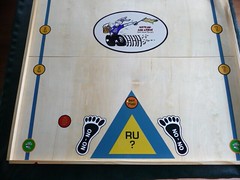
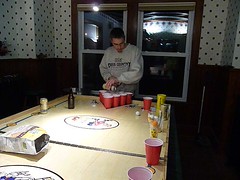
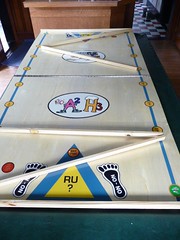
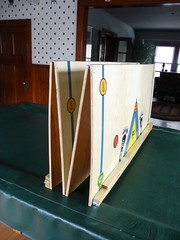
OMG, it turned out terrific! The It was fun to hear the comments about the beer pong table; it is rather sweet. It is 4'x8' and folds to 2'x4' with side rails that fold in too. I plan on making a carry case of some sort for it. The total weight is 44 pounds. I took several pictures of it being folded up... mostly because even I thought it was cool to see.


Sunday, January 25, 2009

Ice Luge

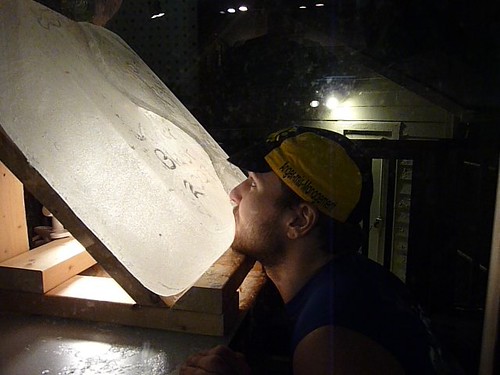
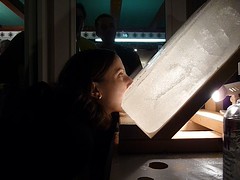
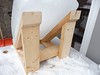
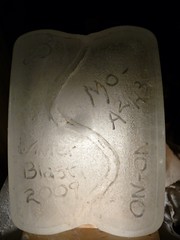
The luge was a big hit and turned out super cool with a little bit of extra engraving along side the channel. I used my dremmel tool to do the carving. I took some pics of the stand too since it worked out so well. There are a few gnawed off parts though from the squirrels chewing off the liquor that didn't make it into mouths... go figure.

The light under the luge really made it look awesome!


Saturday, January 17, 2009

Homemade Ice Luge

Ice Luge 1Experiment #.... ? Heck I don't know I lost track. Anyway, this should turn out fine so long as the temperatures stay really really cold! So I bought a 35 Qt plastic storage container that was short and squat from Ace Hardware at 50% off. I consulted my buddy Lance about how to freeze the clearest block of ice. I bought 9 gallons of water from the Meijer refill station which is only .29 per gallon.

The ice looks goodEarly this morning I set up my block freezing in the back yard on top of a glass table top. I checked on it after about 10 hours and it looks pretty clear... so far.

The Beer Pong Table is Making Progress

Beer Pong Table

Step (1) Cut the plywood sheet into 4 equal pieces. So it took me a while to get the wood squared and even when I pushed the pieces together. I finally accomplished this by cutting 2 pieces together with them facing in the same manner as they would once hinged.

Next I (2) lightly sanded the edges and both sides of each piece.

After the wood was cut I (3) polyurethane the wrong sided and all the edges. Then it warped some. Ok, more than some... quite a bit. I did get is straightened out mostly by sponging the top and applying heavy weights and clamping it down. Needless to say, I'm now going to do an extra step to make sure the board stay straight for play.

While the polyurethane dried completely, I (4) cut out the decals that I made on my computer and had printed at Costco. They look darn good if I do say so myself.

I then removed the center hinge since it rests on the right side of the wood so I could paint. In step (5) I taped off for 2 lines 3/4" each running the length of the table on both sides, taped off a triangle 3" from the bottom on each end. The triangles measure 16.5" centered at the bottom and a height of 14" from the center of the triangle. Then I primed the taped off sections and painted them.

The paint is drying now then the next step will be to position my decals and urethane the top of the table.

Saturday, January 10, 2009

Plans to Build a Beer Pong Table

Yes, that's right. A beer pong table to entertain our guests on Jan 24 since DH volunteered to host an overnight party at our house. Anyway, I decided to make the beer pong table to fit over our regular pool table mostly because I didn't want the drunks setting their beers on my pool table felt! Oh come on... you know it would happen.

THE PLAN!

Build a folding table top out of 4'x8' birch plywood using piano wire to hinge it. Seal the underside and the exposed edges of the plywood. Attach some beer catching edging at each end. Paint designs and attach printed designs on to table top. Polyurethane the top. Make a carry case with shoulder strap.

Whew! This will by far be my largest free standing wood project. I went to Lowe's and Home Depot and got what I think will be the necessary supplies to complete the project.

I'll have a series of posts here on my blog regarding this project... stay tuned.

In response to a question "Well, Have you made the table?", the answer is YES! It is totally sweet. Here my other blog posts on it since for some reason searching "beer table" in my search box isn't pulling them up.Go figure. Anyway...

http://detroitknitter.blogspot.com/2009/01/beer-pong-table-is-making-progress.html
http://detroitknitter.blogspot.com/2009/02/beer-pong-table.html

I bought some strapping material from JoAnn's and a couple of those plastic buckles and fashioned a carry strap for it. Basically, it gets folded up into quarters then near each end a buckled strap goes around the it. I then clipped on a padded carry strap from a duffel bag I'm not using to the two straps. It is easily carried over my shoulder. Well, as easily as a four 2'x4' hinged pieces of plywood can be carried. For set up away from home I use two of those super lightweight sawhorses made out of plastic and two 2'x8' pieces of lumber that I hinged in the middle. I do need to use a couple shims on the reverse side of the hinges to keep it really straight. I also took out a couple grooved in the 2'x4's so the hinges lie in the groove.

Tuesday, December 23, 2008

How to make Bookmarks and Covers

Bookmarks

So I came up with this last minute gift idea for my nieces and nephew since I was only giving them $20 each and didn't have any money cards and since money cards cost.... money!

I had made a couple bookmarks several years ago for myself and my brother and they turned out so cool I decided to make them again. But I still had the problem of not having an envelope... so the creative wheels got turning and I wound up with these totally cool and personalized bookmarks with covers!

Here's a quick picture tutorial on how to do it. Obviously you'll first need to create the bookmark with a picture. I used a photo editing program to create the bookmark following the process as the pictures indicate. I decided to sign the backs.... "Love Aunt Marni 12/2008". Then printed them on photo paper. Had them laminated at Kinko's ($2) with hard laminate. Trim so there's about 4mm of laminate around the bookmark picture, punch a hole at the top and attach a tassel. I made my own tassels too from embroidery thread (.25 each color at Jo-Ann's).

How to - Blank canvas How to - add the picture How to - add a quote

Bookmark coversTo sew the cover I used some green felt I had laying around (thus the one that is a different hue of green). Felt squares are 9 1/2"x 12" and can be bought for about .30 each. One felt square will make 2 bookmark covers. Cut four 3" x 9 1/2" pieces. Fold down 1" on one end of each cut piece and pin. This folded over flap is the opening for the bookmark cover. Align two pieces so that the folded flaps are facing each other (this is the right side). Pin the edges and sew 3/8" around but do not sew across the very end where the flap is. Now trim the bottom corners close to the stitching and turn it right side out. Poke out the bottom corners with a pencil tip.

Bookmark covers - openDecorate: The snowflakes I used are buttons that I cut the loop part off of so it would lay flat and I glued it on with "Fabric Tac". I then wrote the name in glue and sprinkled with glitter. Knock off excess glitter and let dry.

They are avid readers and I hope they really like these. I'll let you know what they think of their cool bookmarks.