
So I came up with this last minute gift idea for my nieces and nephew since I was only giving them $20 each and didn't have any money cards and since money cards cost.... money!
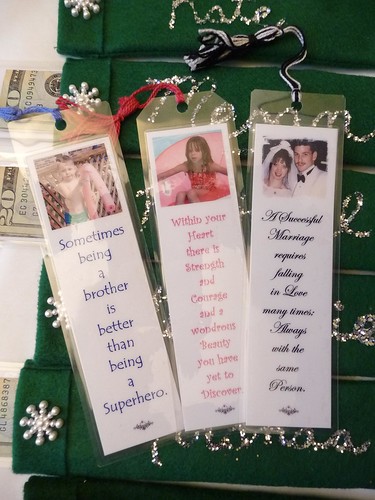
I had made a couple bookmarks several years ago for myself and my brother and they turned out so cool I decided to make them again. But I still had the problem of not having an envelope... so the creative wheels got turning and I wound up with these totally cool and personalized bookmarks with covers!
Here's a quick picture tutorial on how to do it. Obviously you'll first need to create the bookmark with a picture. I used a photo editing program to create the bookmark following the process as the pictures indicate. I decided to sign the backs.... "Love Aunt Marni 12/2008". Then printed them on photo paper. Had them laminated at Kinko's ($2) with hard laminate. Trim so there's about 4mm of laminate around the bookmark picture, punch a hole at the top and attach a tassel. I made my own tassels too from embroidery thread (.25 each color at Jo-Ann's).


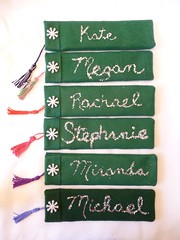 To sew the cover I used some green felt I had laying around (thus the one that is a different hue of green). Felt squares are 9 1/2"x 12" and can be bought for about .30 each. One felt square will make 2 bookmark covers. Cut four 3" x 9 1/2" pieces. Fold down 1" on one end of each cut piece and pin. This folded over flap is the opening for the bookmark cover. Align two pieces so that the folded flaps are facing each other (this is the right side). Pin the edges and sew 3/8" around but do not sew across the very end where the flap is. Now trim the bottom corners close to the stitching and turn it right side out. Poke out the bottom corners with a pencil tip.
 Decorate: The snowflakes I used are buttons that I cut the loop part off of so it would lay flat and I glued it on with "Fabric Tac". I then wrote the name in glue and sprinkled with glitter. Knock off excess glitter and let dry.
They are avid readers and I hope they really like these. I'll let you know what they think of their cool bookmarks.


No comments:
Post a Comment