

I cut out the stencil using the plastic stencil sheets from the craft store and several very sharp exacto blades. For a cutting surface I picked up one 12"x12" ceramic tile from Home Depot. I made a stencil for each color and labeled the bridge pieces because they would have to go back in to block the yellow. Before beginning tape a piece of wax paper inside the shirt so the paint doesn't soak in all the way to the back of the T.
 After lining everything up, I stenciled the bridge. As you can see there was a lot of tedious work to put all the stencil pieces back in to make the bridge the way I wanted it to look. I went back later and hand painted on the cables for the bridge.
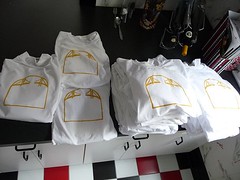
After the yellow was dried I rolled on the red with a stencil roller and let those dry then did the blue. The red and blue was a breeze compared to the bridge!


Next I put the wording on. I printed it off on my computer and then used a small light under a glass table as a light box. Now that I can see the words I used a fabric marker and outlined the lettering. I will be using a nifty little battery operated air pump painter to fill in the lettering, but you can just fill it in with the fabric marker. I did notice that the marker alone faded after the first washing so make sure you fill it in dark!

After it was dry I used this same outlining technique and put hash names on the back of the shirts. I got a little creative with some too!


Technical stuff:
- Jerzee brand shirt: 50% cotton, 50% polyester
- Paint: Cheapo Craft Smart from Michaels mixed 2 parts paint with 1 part Ceramcoat Textile Medium from Joanns (you can use Joann brand paint I'm sure - I just happened to have some of the paint colors already so I stuck with Craft Smart)
- Tape wax paper inside the T-shirt before painting and leave it there for multiple colors.
- Use very sharp exacto to cut
- I bought a T-shirt cardboard cut out with a waxy surface. If you mark the corners of your stencil onto the cut out (or on a piece of masking tape on the cut out like I did) it helps to get your stencil lined up and you'll only have to measure once. Also I drew a line for where the collar is so that when I put the stencil down it would always be at the same length down from the collar.
- Spray adhesive is a must for the stencil. I found mine at Michaels. I later found the same stuff by Elmer's at ACO in a much larger can.
- I didn't wash the paint after every stenciling. I did however wipe the stencil while it was still on the just painted T. It seemed that after about every 4-5 T's that I needed to ungoop the stencil and respray it.
- You can clean the adhesive off the stencil with a Goof Off type product. Alcohol (not the drinking kind - heaven forbid) will remove the last bit of goop. I found it handy to totally clean the stencil like this after about 15 T's.
- The cleaner and tackier your stencil the better the image will come out.
- For the yellow I used a sponge and dabbed on the paint and rolled the blue and red. I found a stencil roller at Joanns.
The shirts came out fabulous! I also did one using a polyester/spandex mix cheap tech shirt to see if the paint would last. All together I' made 27 shirts... hey, that's more than a marathon of shirts!
Using a stencil I also made a bunch of signs to put along the course...

Using a stencil I also made a bunch of signs to put along the course...

(Tags: how stencil shirt t-shirt paint acrylic adhesive roll)


No comments:
Post a Comment