So I decided that I must have a garden arbor for the "entrance" to my newly created outdoor peaceful space with the garden bench, new landscaping and freshly painted garage. I got the wood at Home Depot. After designing my arbor I bought six 1"x4"x10' and one 1"x4"x8' pieces of cedar and went to work. I only made one design change mostly because when I tried to cut 7/8"x7/8" stop pieces one fell apart in a couple places because of the knots; something to keep in mind when ripping the wood. I'm going to explain in hopefully not too much detail the construction of the arbor. It was really quite simple to make. The total cost for the wood and glue was about $53. I used an entire 8 oz bottle of glue!
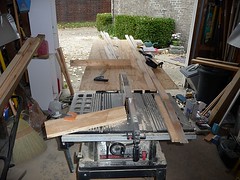 1. I needed a larger workspace to rip the 1"x4"x10' cedar boards into the size pieces I'd need for my arbor. Unfortunately it was cold outside, but the garage provided enough protection from the wind during the construction process.
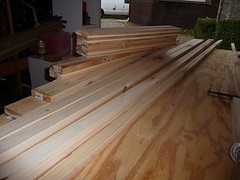 2. Here are all the pieces aftr ripping. I don't have a picture of it, but 4 of the pieces ripped for the "legs" I made a groove centered down the length wide enough to insert the horizontal lath into.
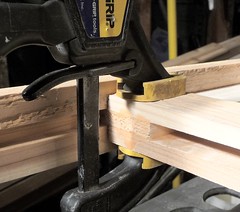 3. At this point I've glued in the vertical lath into the grooves and am now attaching the horizontal lath to the top and the bottom. Only the top and bottom will get the double lath.
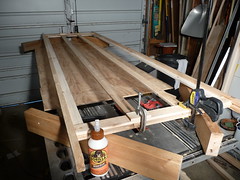 4. After letting the glue dry for the double lath on the top and bottom I then slide the other 2 vertical lath pieces between the top and bottom laths. Notice these are equally spaced. Notice that I have the side elevated on 2x4s so I can get the clamps under it. Glue, clamp, wait....
 5. Wow, I need more clamps! Ok, Now for the horizontal pieces. Once I calculated how much space I would need between lath pieces I cut a piece of board to that size so I didn't have to keep measuring. The board is not pictured. Anyway, when constructing the arbor I had to keep in mind that the public side was facing down. I messed that up a few times, but it's not noticeable. This process took a while since I only had 11 clamps. Fortunately I didn't have to clamp it for too long and could remove the clamps for the next part since the side wasn't being moved around.
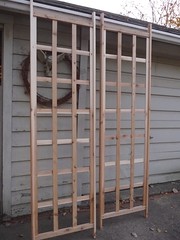 6. Here are the two finished sides for the arbor.
 7. Next is to square the arbor and attach the beams. Notice that I've cut a notch from each end of the beam with a jigsaw. Note that the structure is elevated on 4x4's.
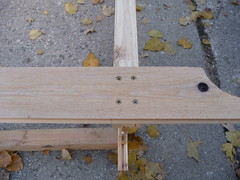 8. Finally I'm using screws! Here I've countersunk 1 5/8" deck screws to attach the beam to the sides. It's important to use deck screws since any other screw will react with the acidity of the wood. You can use stainless steel too, but that would cost an arm and a leg! To attach the beam to the other side you'll want to stabilize the unit by clamping scrap wood across each side of the bottom as seen in the picture with me standing in it. Always clamp the bottom like this when moving the arbor.
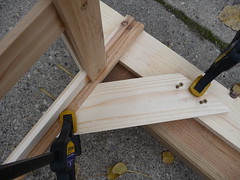 9. Attach 4 angled braces to help sturdy the structure. Both ends are cut at 45°. Technically the two 3" screws you see there horizontally should enter the brace and follow the grain of the wood. This is something I learned later, but what I did worked just fine. The other 2 screws are 1 5/8".
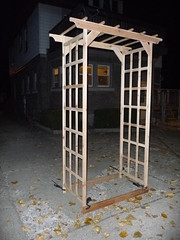 10. Hmm, I thought I took pictures of the canopy installation. Oh well. Obviously the canopy pieces are all centered across the top; they are glued and screwed into place.
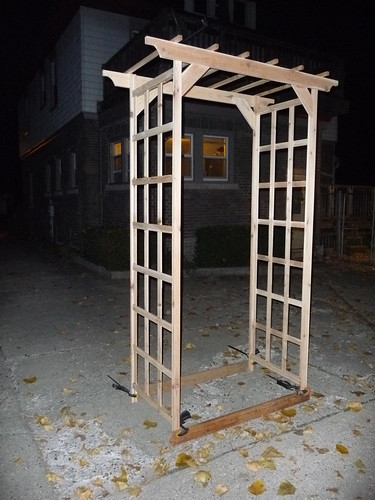
Anyway this photo shows the arbor in completion. Here you can see the braces on the bottom.
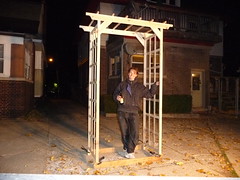 11. Have a beer and enjoy the finished structure. I was surprised at how big it looks! Yes, I have glue all over me.



No comments:
Post a Comment