
 |
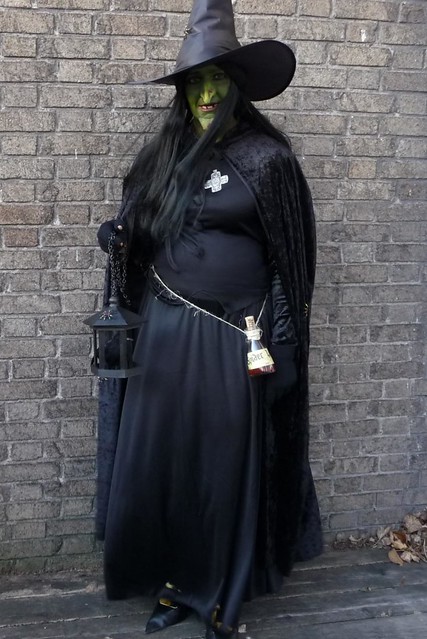
| The "Wicked Witch of the Eastside" with her little crow, "Toto", brought havoc and debauchery to the otherwise quiet city of Birmingham this Halloween. (DetroitKnitter - 2010) |
The make up is all CHEAP stuff!! I went to Walmart and found this cool nose and chin set for $5; while it did come with liquid latex to attach the nose and chin, I decided to try this "spirit gum" that I got from Halloween City (seasonal costume store). All of the make up items used to create my face are from walmart for $2 each (some was left over from last year too).
So here's what I used and how I used it--
TEETH: Start with you teeth! I found this small bottle of teeth paint at Walmart ($2) and it works really good! First brush your teeth. It is very important that your teeth be dry or it won't even go on so dry your teeth with a paper towel (I used a hair dryer to really dry them). Now simply paint the teeth you want to blacken out, create chipped teeth, and even apply some at the gum line and give it a little smear. LET IT DRY!! It only takes about 30 seconds to dry I again used the hairdryer.
VERY IMPORTANT!!!! NOW IS THE TIME TO PUT YOUR COSTUME ON!!! Otherwise you won't be able to get it over the nose and chin without messing up your work. Remember to protect your clothes by tucking paper towels into the neck opening before proceeding. If you are using a wig, now is the time to put your hair up. An old stocking cut and knotted is recommended for wig use. If your hair is long, like mine, put it in pig tails and twist each up to the lower back side of your head and bobby pin it then put on the stocking cover.
APPLY MAKEUP
BASE COAT: Start with a base coat. Since this is cheap make up, it doesn't cover flawlessly, but by creating a base color on the bottom your finished look won't be quite so blotchy. Use the green liquid cream make up that comes in the tube ($2). Cover your entire face! Please be careful not to get make up into your eyes and avoid placing in the corner of your eyes over your tear ducts (wonder how I know this?) Don't forget to do your ears! Let the base coat dry.
TOP COAT: Now use your fingers apply solid green make up (comes in a little rectangular tray with a sponge - $2) and completely coat your face (the sponge it comes with doesn't work well at all). I started near the seam line for the nose/chin and worked my way out. You'll need to make it a little darker in some places and you can create some depth by dabbing on a touch of black solid make up and blend it with more green.

EYES Outline your eyes: You can use the same solid black make up with a Q-tip. Again be very careful not to get this stuff in your eyes! It can cause irritation.
LIPS: I had one of those super cheap clown make up kits with the short little coloring sticks and used the red to go over my lips first, then I used the black lipstick from the lipstick and nail kit ($2) BTW, the nail polish is really bad and drys chalky. I wound up buying some green polish in Wet and Wild in the cosmetics isle (they were out of black... go figure)
WIG: Carefully put on your wig. If it's cheap like mine ($8) it probably hangs too far in front of your face. Tiny little claw clip will fix this! Or you can pull back the front pieces and put them in a small ponytail holder at the back of your head.
HAT: Put your hat on! These cheap hats ($4) are wind catchers! So put it on down as far as you can and be prepared to chase it down the street a few times if it's at all breezy out.
Things to note when wearing this costume. The most noticeable thing is that breathing through the nose will cause condensation in the tip of the nose and on occasion when you tilt your head back to down your favorite beverage, you will get drips. The drips will wash away the green and touching/wiping is the worst thing. I kept a couple Q-tips and occasionally dabbed (when no one was looking of course). Taking the solid green make up with you and the black lipstick is a smart thing to do. Put the face make up in it's own separate baggie.
Tips on how to make your own crow in a cage coming up tomorrow. Yeah, it will be after Halloween but since it's 5 o'clock Halloween night now, you won't have time to make one tonight anyway!


No comments:
Post a Comment